This is part two of my skin retouching workflow article, so if you have not read part one yet, please read it before continuing, because this part just expands on the ideas from part one. You can find part 1 here.
Before we start I would like to talk about the before / after images. I decided to not to use any recent work. I don’t really do much of side projects at the moment (too busy), so it has been a while since I have worked on images just for fun. The photo used in this article was shot by Alice Lehman and was retouched by me 2 years ago. Since then, my technique improved, but skin retouching workflow is still pretty much the same.
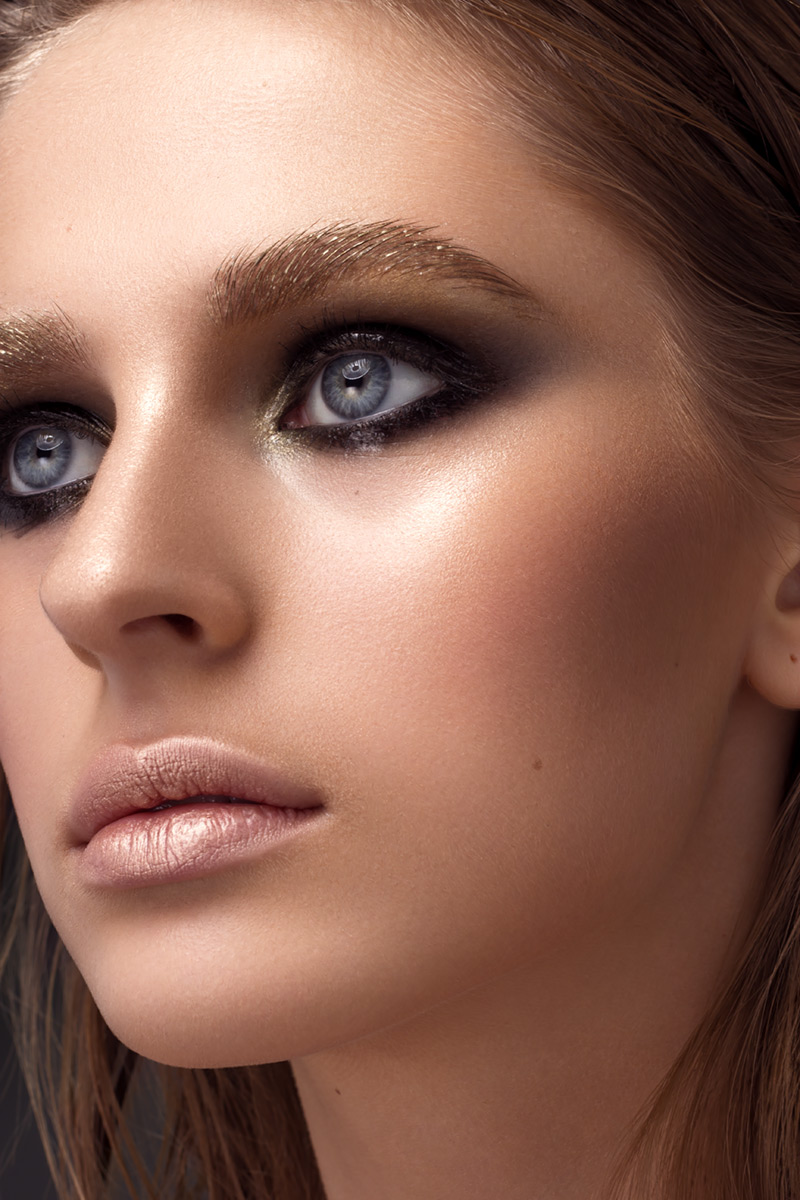
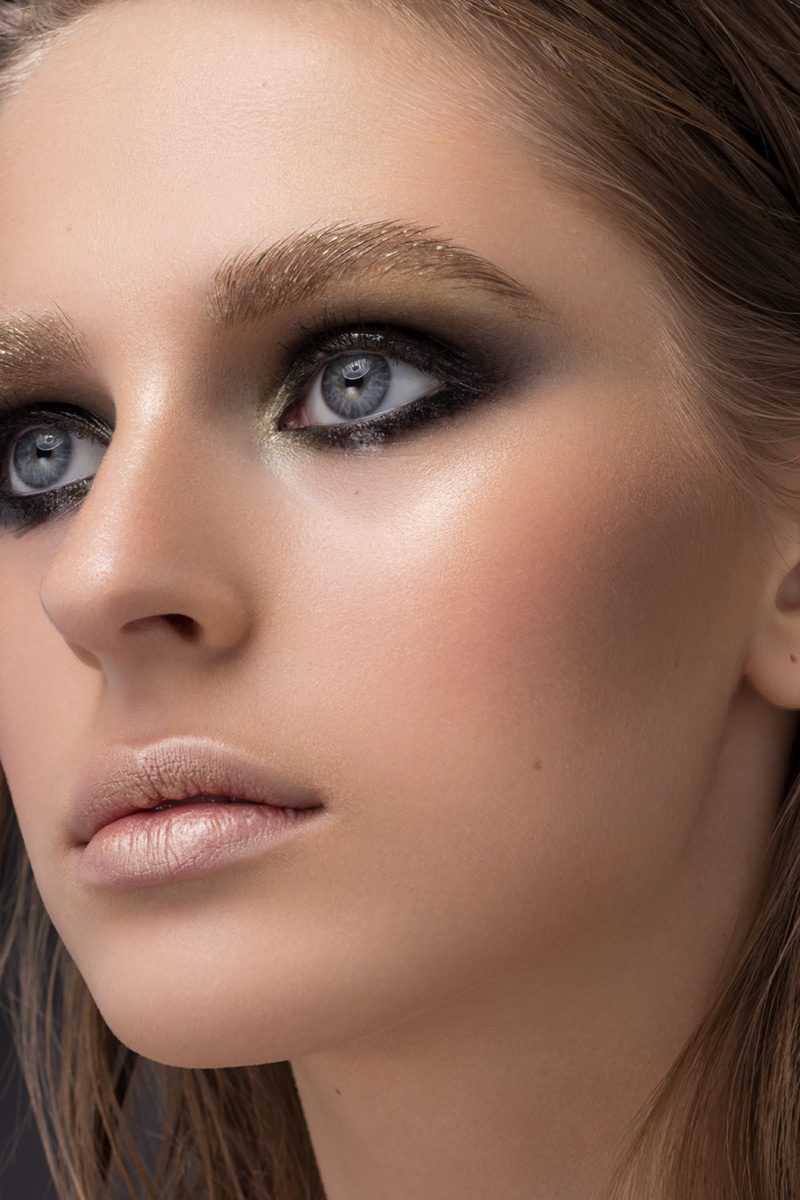
Here is the image we will be working on. This is the finished full retouched photo:
The goal
The goal of this article is to go in a little bit more into detail about what tools I use and how I use them to achieve a nice healthy, but still natural, skin in my retouching workflow. I would like to stop here for a second and talk a little bit more about the “natural” part.
Importance of good skin
It is and always was, extremely important to me to keep the skin looking as natural as possible. What I mean by that is, the ideal scenario is that the viewer looking at the skin, even in detail, cannot tell if it was retouched and which part, if any, was changed. This is the ultimate goal. When it comes to achieving that goal, there are many variables which determine if this is achievable and in what percentage. So let’s talk about this some more.
As I have already mentioned in part one, the base skin quality when we start on with an image is extremely important. If I have a photo in front of me (portrait closeup) with bad skin, I know straight away that that goal will not be achieved. Skin can be repaired (and often is), but if the base skin is rough, there is no way to fix it and then improve it at the same time. I call it being in a “fix mode” when dealing with bad skin, as oppose to being a in a “improve mode” when dealing with good skin.
Over-retouched
What I mean by that is when I’m done fixing the bad skin, it already looks like there was work done to it. There is no way to keep working on it and keep the natural aspect. Of course, it all depends on severity of the skin problems, if the problems are not too bad, then it is possible to improve a little bit and maybe we can get away with not making the skin look over-retouched at the same time.
I wanted to mention that again, because this is such an important topic. If you want to have a beautiful skin – natural, fresh and healthy in your portfolio, you need to start from a good base. Pick models with the best skin possible and then improve on it. You will be wasting your time fixing skin in Photoshop and hoping you can keep the results natural and healthy.
Workflow – overview
Before I start to go deeper into specific tools and how I use them, I want to mention a couple of things about my workflow and how I generally go about it.
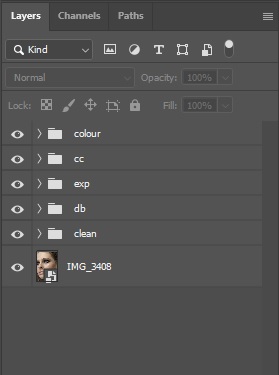
I have a set workflow, which I follow pretty much every time in the same way. I also like to keep things organised within my layer pallet, so I divide my workflow into steps and keep each step layers inside a separate folder in my layer pallet.
Workflow steps explained
The workflow order is usually this:
- Step 1 – clean (working folder name: clean) This is the step where I clean the skin from distractions and fix and remove other areas around like hair or background. This is typically a step that takes a fair amount of time.
- Step 2 – dodge and burn (working folder name: DB) This is the dodge and burn step, where I improve the skin smoothness. It takes a fair amount of time.
- Step 3 – exposure (working folder name: exp). I try to avoid working on colour and exposure values at the same time, I always like to lock my exposure values first before moving to colour work. Typically, I fix or modify exposure inconsistencies here. If I need to add or remove contrast, either locally or globally, I usually do it in this step. If I want to darken or brighten specific parts of the image, this is also where it’s done.
- Step 4 – colour correction (working folder name: cc). This is the step where I fix all colour inconsistencies. I start the process during my RAW convertion stage, which I will write a specific article about at some point in future. My goal here is to make everything as neutral looking as possible, you can even say “boring”. I make sure my greys are grey, blacks are black, whites are white. I also fix skin colour inconstancies. If I have to make sure a specific bit of the image has a specific colour (like lipstick for example), that is also the step I do this in.
- Step 5 – colour grading (working folder name: colour or clr). While the step 4 was making things to look boring, this is the opposite. I make sure colours look like they should in CC stage, so that I have a good base for the colour grading step. This is where I can unleash my creativity, if I don’t have a specific colour requirements from the client. I use a variety of tools in this stage to achieve a pleasing colour harmonies (or sometimes, colour clashes) within the image. I also plan to write an article about this process in future.
Skin retouching workflow – tips
Couple of tips I want to mention before we continue.
First one is about the “undo” button. The tip is to make it easily accessible and use it often. Especially when you are only beginning, don’t be scared to experiment with tools. If you make a mistake, hit undo and try again. Keep doing it until you learn. Remember it is a slow process and there is a lot to learn, but it is important to keep practising and also to experiment.
Many of the things I will be talking about during describing how I work with specific tools, I learned while experimenting. Some of them were just a “happy little accidents”. So assign your undo to an easily accessible button and use it often. I have also modified the undo settings in Photoshop to the maximum 1000 steps back. I don’t ever use it to that extreme level, but I have the ability to if I need it (remember you need a powerful computer for that).

Second tip I can mention here is that I have also set up a couple of keyboard buttons to act as a navigation around the layer pallet. I use this all the time and it is such a time saver. Instead of having to go to the layer pallet and select the layer I want to work on, I use Layer Up or Layer Down shortcuts to move either up or down on the layer pallet.
OK, now that we have this out of the way, let’s dig a bit deeper into the workflow and look on how I use the tools mentioned in part 1 in a bit more detail. Let’s start with healing brush tool.
Skin retouching workflow – Healing Brush Tool
This is my go-to tool when I start to work on skin retouching. The process usually start with me transferring image from my RAW converter software into Photoshop, creating a blank layer, saving as PSD in a desired folder (I do it at the beginning to be able to quickly hit Ctrl+S to save during work, it is a habit now) and hitting A which is my key-shortcut for HBT.
While zoomed out of the image I quickly scan the skin to see what the biggest issues I need to deal with are. I keep a mental note of them myself, but if you are only starting out I advise to circle them on an empty layer and to keep track of your progress.
When I’m assessing the skin, I usually look for a few things:
- Skin texture quality and places where it needs to be repaired
- Skin texture smoothness and places where I need to improve on it
- Skin texture blotchiness or colour inconsistencies.
I am at stage when I can assess all of those quickly just by looking at the image, make a mental note of them and keep my track while I go.
Working with Healing Brush Tool
I don’t have a specific starting point where I start work on skin every image. It depends and I also like to jump around from one place to another when working on skin (or hair). The more skin is improved, the more other issues, not fixed yet, stand out.
I usually start fixing the most obvious problems first, like removing blemishes or little skin imperfections.
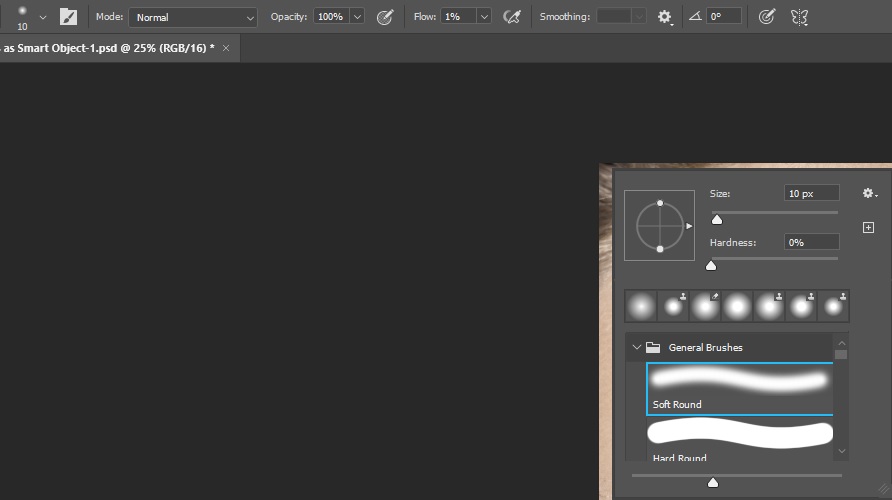
Here are my HBT settings:

Sampling
The most important thing while working with HBT and CST is the sampling spot. I do it now all without thinking, but general rule is to find a place as near-by of the problem area as possible, with similar looking skin texture and similar colour and brightness values to use as a donor area. You need to remember that skin texture varies across the face. Skin texture from cheeks is not the same as skin texture from forehead or nose. It is important to keep finding similar looking spots to sample from as you go.
When it comes to sampling from or fixing area that are near edges or much brighter / darker areas, you have to be extremely careful about picking the donor area. If I have to fix a small imperfection near the eye for example, I am very careful to sample from the spot just next to the one I need to fix. If there is any edge near-by, I sample from the exact spot on the edge to match the area I need to fix. It is a little bit difficult to describe that in words, but I hope you understand what I mean. This way you can fool HBT into behaving like CST to a certain point.
The advantage of HBT over CST while retouching skin, is that it not only transfers the values over like CST, but also tries to match the spot you just transferred with the surrounding skin, sort of blend it in. I think of it like a more intelligent version of CST.
Skin retouching workflow – Clone Stamp Tool
When I work with CST while retouching skin, there is always a couple of things I like to keep in mind.
One is that CST is less “intelligent” than HBT and I need to be even more careful where I sample from. The second is that I need vary the CST brush softness values as I go, manually, to help to match the donor area. For example, working with skin texture I usually increase the hardness of the brush, otherwise the texture transferred over with look a bit soft. When working in areas where skin is softer looking, I typically manually decrease the hardness of the brush.
I also keep adjusting the flow settings. Sometimes I don’t need to transfer 100% of the donor area and just a small trace of it is enough.
Clone stamp tool – uses
As mentioned in part 1, I use CST where HBT is struggling, but CST is my default tool for fixing a few things, like makeup edges for example or removing bigger areas of stray hairs from background. Also sometimes, there is no other way than remove stray hair one by one by using CST. It’s a tedious and slow process, but sometimes it’s the only way. More on hair retouching in future.
Touching on fixing makeup, I am not a fan of creating a hard selection around makeup and following the lines perfectly like I sometimes see on some images. It rarely looks natural to me. It looks like the makeup was created in Photoshop. I fix makeup lines using CST mostly and I go about it by hand with no selection set. I like when it still looks natural when I’m finished and do not like a perfect lines… but I digress.
I often use CST as oppose to HBT while working with hair. I might do a separate article about working with hair in future, but for the time being I just want to mention that it is easier for me to remove single hair using CST. Not always though, sometimes HBT works just fine, but more often than not CST is my go-to tool here.
Here are my CST settings:

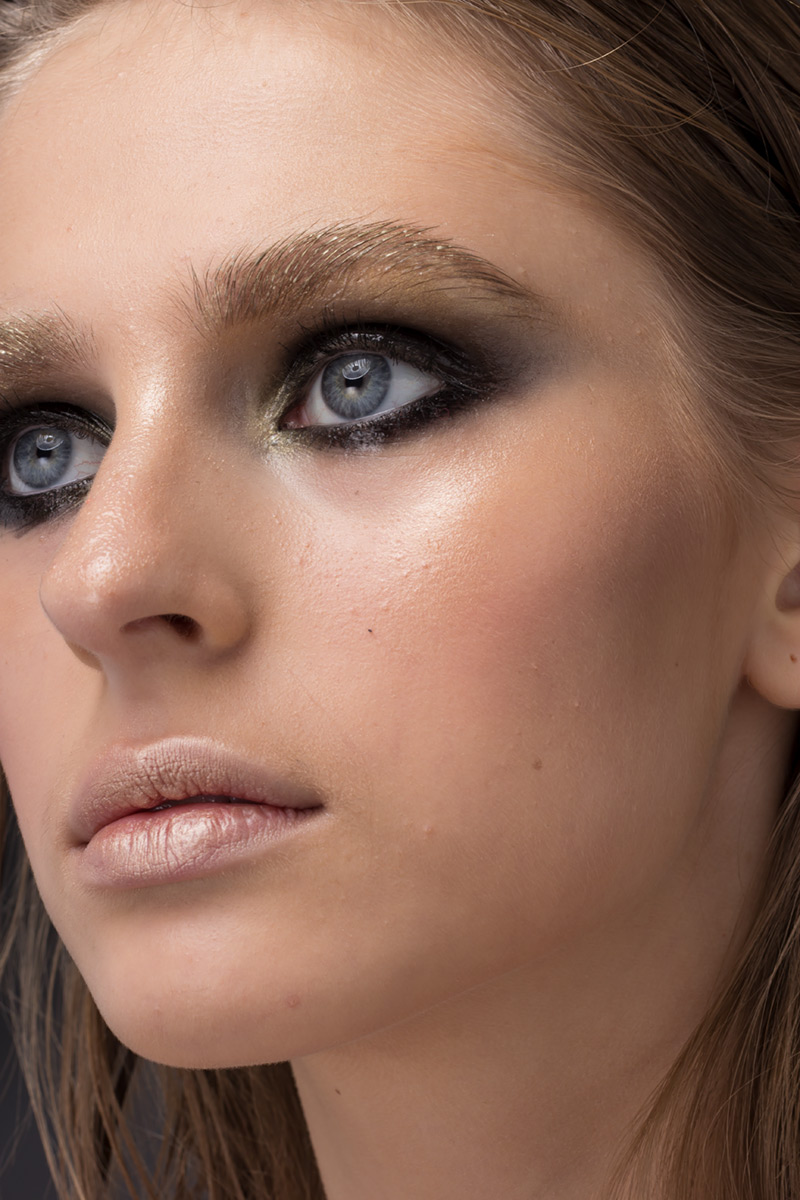
Bellow you can see the before and after the cleaning stage. Before photo is straight out of camera (after RAW conversion). After photo is showing you changes done during cleaning stage.
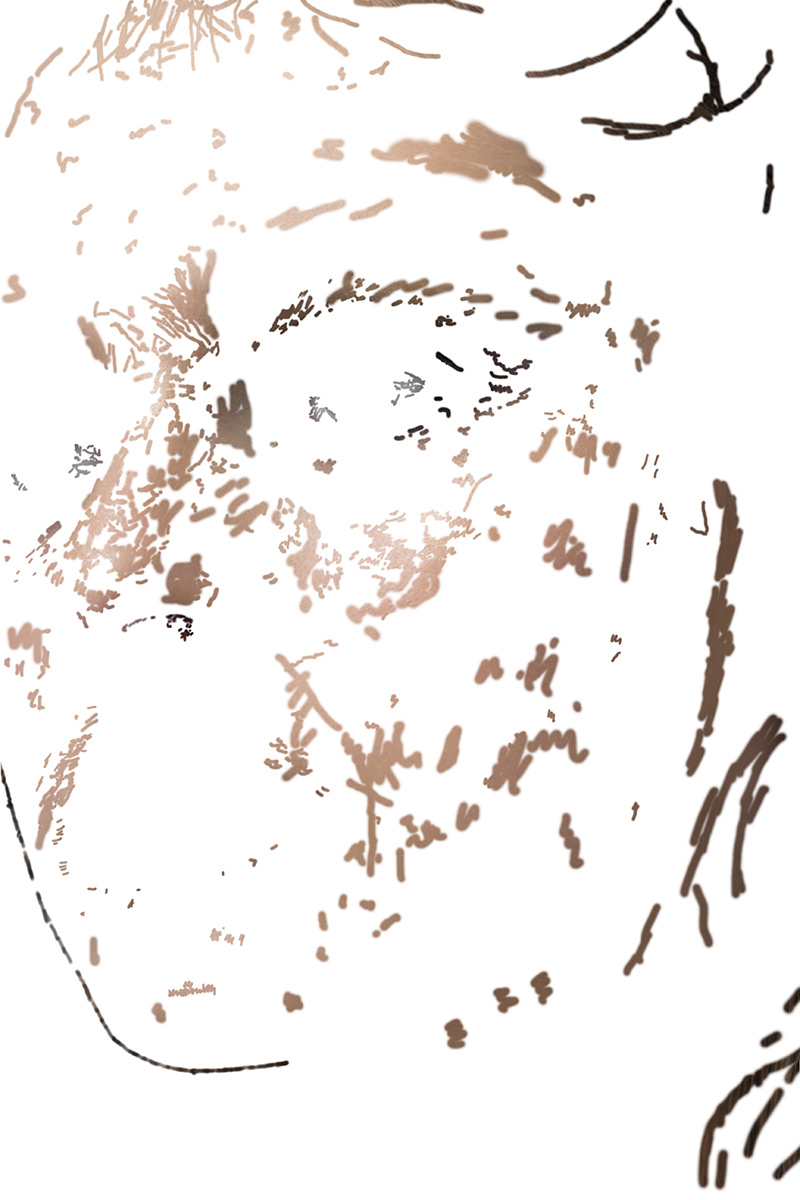
Here are all the changes done during the cleaning stage on a blank white layer.
Content aware
A quick mention about content aware.
I use Photoshop’s content aware in two ways. One is to remove any unwanted distractions from background. The other I use the Spot Healing Brush Tool with content aware selected to work on hair.
Sometimes when I have some bigger unwanted things creeping into the frame, like a light stand or softbox, I use Shift f5 (or Edit > Fill > Content Aware) to remove them out of the image. Sometimes I need to follow up with either CST, HBT or DB to improve on that area further, because content aware is often not perfect. But the idea here is to remove as much as possible as quickly as possible and CA is a pretty fast method.
Spot Healing Brush Tool with Content Aware selected I use mostly when working with hair, specifically when working on stray hair within hair area. I don’t like using it for skin or any other area with important texture, because it rarely does a great job transferring texture over, but for a quick stray hair removal, it is sometimes a time saver.
Skin retouching workflow – Dodge and Burn
Dodge and burn is such a big subject that it won’t be possible to cover it all here, but as I described in part 1, the way I set DB layers up is: one curve layer for dodge, one curve layer for burn and two help layers, one to turn image into black and white, the other to modify exposure values globally.
My brush settings for DB’ing skin are as follows:
- Soft (100% soft) round brush,
- Opacity 100%,
- Flow 1-2%,
- Pen pressure and all smoothing and other brush settings are off.
I don’t use solar curve layers or any other additional tricks here. I find that many of them are too hard on the eyes and after looking at the image that way for a while I am almost blind and my eyes start to tear up. As I often have to work on images for many hours, I try to find ways to ease my eyes rather than make them suffer even more.
Working with dodge and burn
My general rule while retouching skin using DB, is that I start zoomed out and work on overall flow of the skin and only zoom in at later stages to improve smaller areas if I have to. I try to stay zoomed out as much as possible. When I was only starting out with this technique, I would work zoomed in for hours, only to zoom out and see that the image is a mess. I would then continue to work zoomed in trying to improve the areas I saw while zoomed out, only to find out that it still looked a mess when I zoomed out again. It was very frustrating. So the tip here is to be working zoomed out as much as possible and only zoom in to improve on small areas were fine precision is needed.
DB’ing can take anything between 15 min to a couple of hours. It depends on complexity of the image, the amount of skin in the image (full body shots, few faces, etc.) and base quality of skin.
I don’t usually do any additional contouring using DB technique. I find that if I don my job well in step 1 and 2 in my workflow, there is usually no need to try to add or remove shadows in additional steps.
Dodge and burn – skin texture
I also use DB to work on skin texture, something that is not often mentioned. Skin texture is nothing else but lots of small bright and dark areas next to each other. If I want to make skin texture deeper, I then darken the darker parts a bit more (that’s not something I do very often, but it is possible to do with DB). If I want to make skin texture smoother, less deep, I need to make the darker parts a bit brighter and bright parts a bit darker.
Word of caution here. If you make skin texture too smooth, the skin will look plastic when you zoom out. Please remember that skin texture is very important to the over all look of the skin.
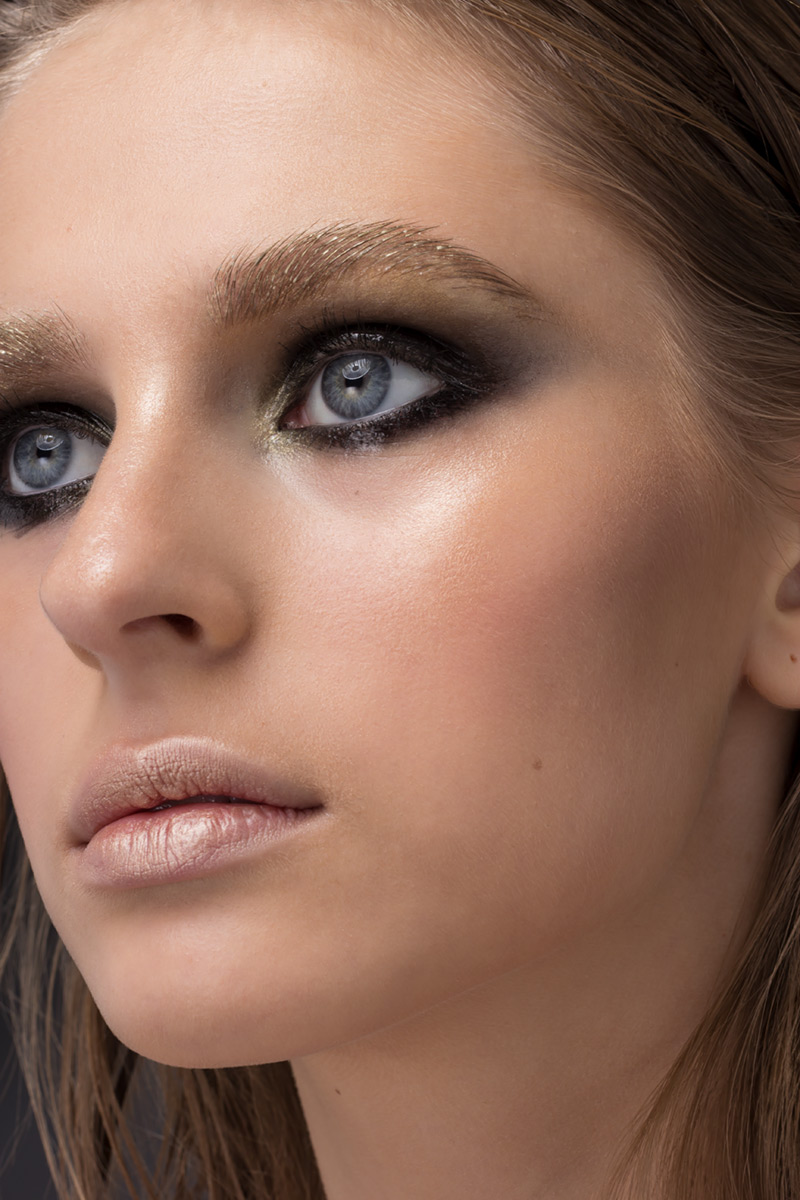
Bellow you can see the changes done during the DB stage. The before image is the same as above, after cleaning stage. The after image is showing you all the changes done during dodge and burn stage.
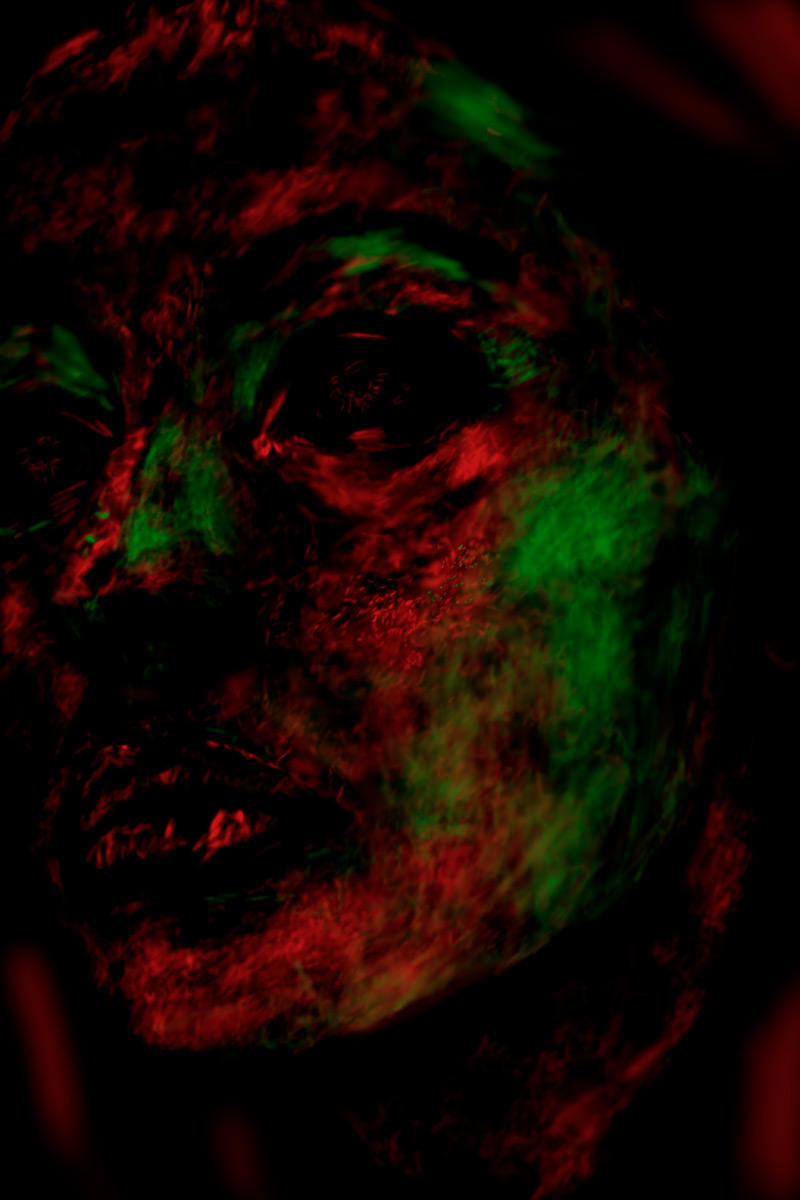
This next before and after slide shows you the exact brush strokes. The before image shows the image after the DB stage. The after image shows you a visual representation of each brush stroke done during DB process. Red shows dodging, green shows burning brush strokes.
Skin retouching workflow – Frequency Separation
I don’t use frequency separation technique for skin retouching at all. Some retouchers do use it, however, to further smoothen skin, but I find that if I do DB’ing well enough, there is no need to continue with another step. I can often tell if FS was used, because of the specific way skin texture looks after FS was used.
FS is a valuable technique to learn and to have in your toolbox as a professional retoucher or photographer, but I would be careful with using it to work on skin.
You can learn about Frequency Separation some more from this FStoppers article about it.
Skin retouching workflow – Finished photo
This next before and after slide shows you all the rest of changes I have made to the image. It shows you the whole retouch from SOOC (straigh out of camera) to finished photo. Before is SOOC. After is finished retouched photo.
When it comes to showing you all the rest of changes I have done in further steps to this image, I plan to create another one or two parts explaining it all in detail. If you are interested in reading it, please let me know down bellow in the comments.
And that’s it, folks…
To sum up. This was part 2 of my skin retouching workflow series of articles (part 1 is here). We have talked some more about how I use the basic Photoshop tools to fix and improve skin quality. There was some more about my workflow, I have given you some additional general tips. We have also talked about Healing Brush Tool and Clone Stamp Tool some more, plus I have went over Dodge and Burn technique some more.
Following the feedback I have received from part 1, I have also tried to add more visual examples and some before and after images to help visualise each step a bit better. Please also note, that I am very open to feedback and would love to know how can I improve this series of articles even more. If you have any ideas, please feel free to leave me a comment.
Thank you
I would like to thank you, Dear Reader, for getting this far. These articles do take a lot of time and energy and I would love to produce them more often, but usually life and work gets in the way. If you think they bring you a little bit of value and would like to see more of them, please consider sharing it, liking and commenting. This is the only way for me to see that there is actually a need for them and helps me to find motivation to keep going. Thank you, Dear Reader. I hope we will see each other in the next part.
If you want to read the other parts of our skin retouching workflow articles, the links are bellow:
Part 1 – My Skin Retouching Workflow Explained
Part 2 – My Skin Retouching Workflow Explained some more
Part 3 – My Skin Retouching Workflow – Working With RAW
Part 4 – My Skin Retouching Workflow – Luminosity and Exposure
Part 5 – My Skin Retouching Workflow – Curves Tool – Why is it important?
Part 6 – My Skin Retouch Workflow – Introduction to colour
Part 7 – My Skin Retouching Workflow – How to fix fingernails in Photoshop
Part 8 – My Skin Retouching Workflow – Simplify the image – remove distractions
If you would like to buy me a coffee, please use the link bellow. Thank you!
About the author

Adrian Alexander is a senior retoucher and founder of Ad Retouch Studio, photo retouching and post production studio based in UK. His first contact with Photoshop was in the 90s, but he found his true love of editing photographs during his photography years, which started when he purchased his first dSLR camera in 2009. These days he is concentrated on his retouching business, finds pleasure in teaching, but his true love is still improving photos in Photoshop.