This is part 4 of my skin retouching workflow series of articles. In this part we will be talking about how I work with exposure values. This is a crucial step of mastering retouching. I can sometimes skip a step from my workflow, but exposure folder is pretty much always included in my layer palette. Mastering manipulating luminosity values will give you a creative freedom to show the viewer images how you want and allow you to manipulate where viewer’s eye is drawn to first. We will talk about how I work with exposure, what tools and techniques I use, what tricks I use and how to work with them in a quick and efficient way.
Do you want to learn how to work with exposure tools within Photoshop and RAW converter software? Great. Let’s get started.
Make sure to read first 3 parts of the series before this one though. Here are the links to previous parts:
Part 1 – my skin retouching workflow explained
Part 2 – my skin retouching workflow explained some more
Part 3 – my skin retouching workflow – working with RAW files
Luminosity and exposure
Before we start though, let’s first talk about what I mean by exposure values. Let’s define a few things here first.
It is a bit of mental shortcut of mine. When I think about “exposure” in retouching, I think about:
– brightness
– contrast
– exposure
– highlights and shadows.
Basically, anything to do with how bright or dark the photo is and needs to be. Probably more accurate would be to use “luminosity” to describe it, but that’s the way I learned it and it stayed in my head ever since. Also Luminosity is a blending mode within Photoshop (which we will talk about here too later on), so to not to confuse, for the duration of this article, let’s stick with “exposure” or “exposure values” instead.
RAW and exposure values
I start my work on exposure values during the first retouching workflow step, which is RAW conversion. We have talked a little bit about that already in the previous article, but we will go a little bit deeper here and I will show you how I do it.
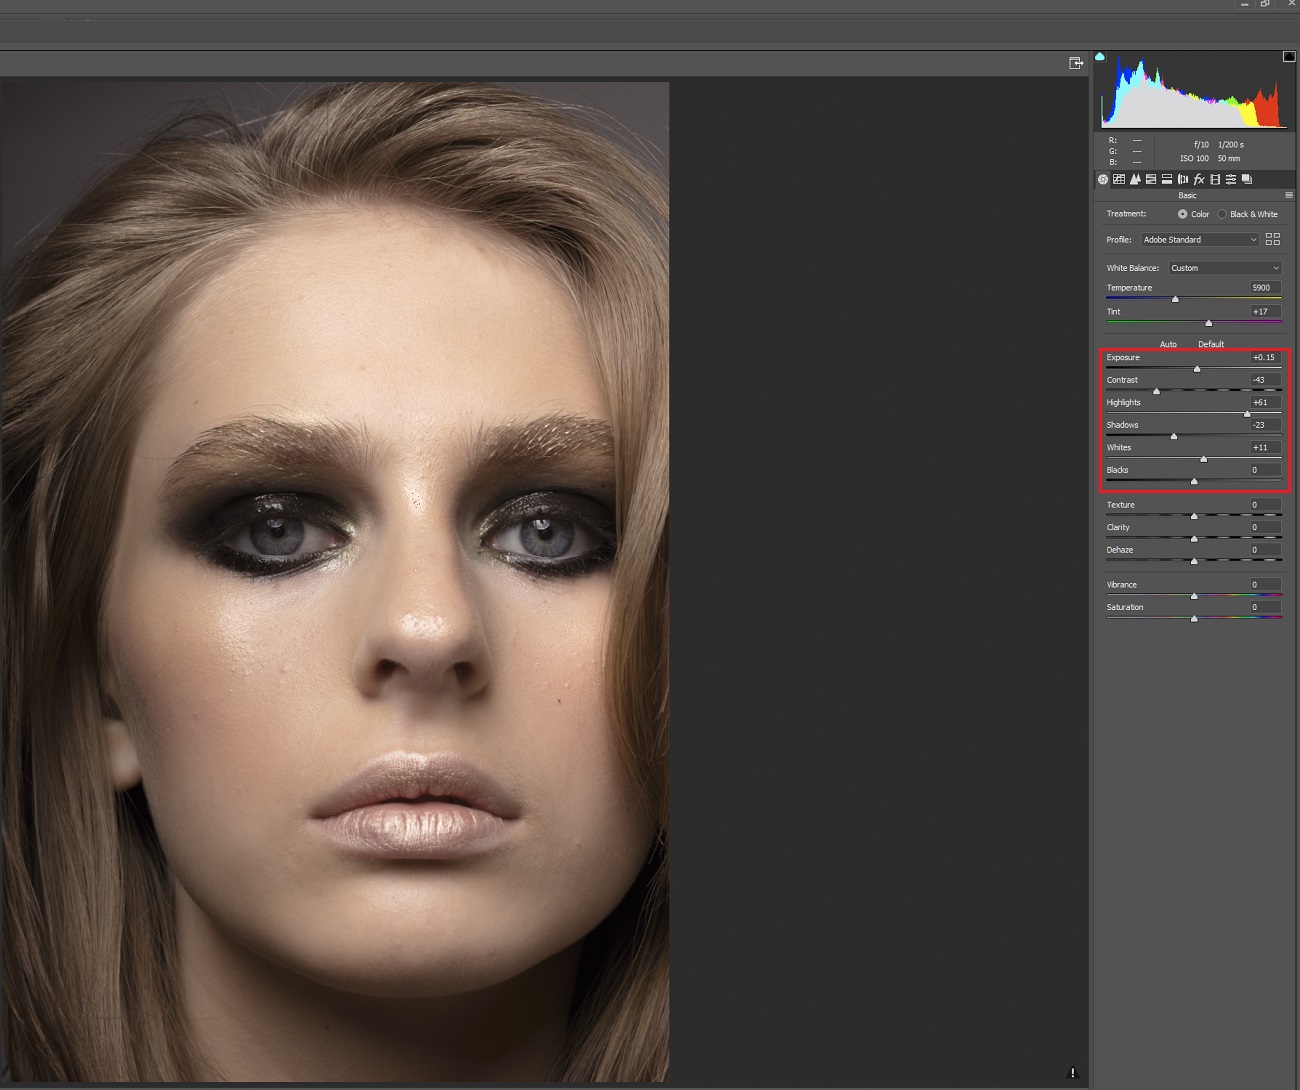
Work on exposure starts with evaluating the image I have in front of me. In some instances, I don’t do any exposure modifications during the initial RAW conversion stage. It all depends on the overall look of the image and the goal I have for it. Sometimes client would request a specific exposure modification, sometimes I do them on my own to achieve a certain look (like directing viewer’s eye around the frame, more on that later). In some cases, images are just well exposed, with well-defined highlight and shadows areas, so they don’t require much exposure modifications.
I do these evaluations and decisions automatically now and don’t really need to keep a list of things to do, but if you are only starting out, it’s a good practice to keep a list of things you need to change and modify, either on paper next to you or as a additional layer in your Photoshop layer panel.
RAW conversion and order
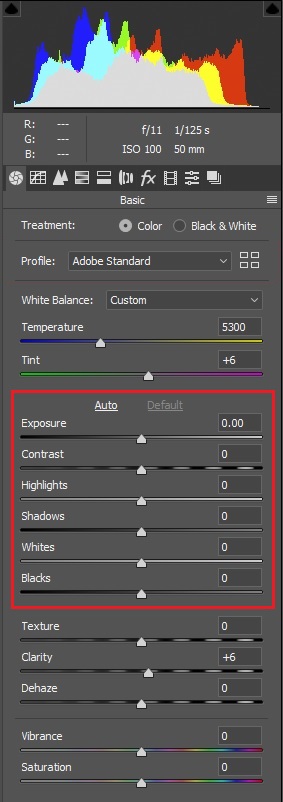
As mentioned in the previous article, I start with working on exposure values when I have my camera profile, white balance and any additional colour changes dialled it.
I always try to separate colour and exposure work. In case of working inside of Photoshop, I always work on exposure first before moving to colour. Inside of RAW converter, I first work on white balance and camera profile look, before moving to exposure. It does not mean that I don’t do changes to white balance after I start working with exposure. I view working with RAW as one whole step. I am a little bit more flexible about the order of changes I make. But as a general rule I do camera profile first, white balance second, then move to exposure sliders.
Let’s talk about the specific things I look at during evaluation stage.
First thing I check is how bright highlights really and how dark shadows are. I’m at the stage of my retouching where I can often evaluate them just by eye, but sometimes I do use additional tools to help me out.
Highlights and shadows
The easiest one to use is just a regular cursor. If you point your cursor over an area of photo in Adobe Camera Raw, it will tell you specific RGB values in the top right corner bellow histogram. Remembering that white is 255 red, 255 green and 255 blue, I hover over the highlight area and check how close those values are to pure white. I don’t want my highlights area to be pure white, because that means they are blown out. I want them to be bright, but not white.
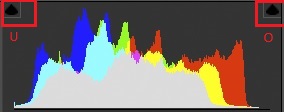
Another tool you can use inside of ACR is Highlight Clipping Warning. You can enable it by pressing O on your keyboard or clicking on the top right square inside of histogram. When you enable it, it will highlight any blown areas on your photo with bright red pixels. Hit it again, to disable it. It is a quick and easy way to check if you have pushed your highlights too far.
255, 255, 255 or 0, 0, 0
I check shadows in exact the same way. Quick glance at the photo. If shadows seem too dark or deep, I hover over the deepest one and check the RGB values (remembering that 0,0,0 is pure black). I also sometimes enable Shadow Clipping Warning (U).
With shadows I am a little bit more flexible than when working with highlights. Sometimes I don’t mind if some areas go near-pure black. It all depends on the look I want to achieve.
After I check highlights and shadows, I need to decide what to do with the global values. If they are too bright or too dark. Some images are over or under exposed so I modify the exposure slider in ACR accordingly. I am looking at having a well-balanced photo, with bright (but not overly bright) highlights and deep (but not too deep) shadows. I treat the exposure slider in ACR as a correction tool. If I think photo is under-exposed by a stop, I add 1 stop of exposure using the exposure slider. When photo is over-exposed, I remove enough exposure to, what I think, is correct exposure.
Histogram
Sometimes the histogram is help too. As an ex-photographer myself, I can often evaluate the photo just by glancing at histogram. I don’t do it very often though, because histogram can sometimes be a little tricky. To put it nice and simple, I don’t do major exposure modifications based on just histogram. Also, sometimes I make a creative decision to keep photo a little underexposed. It all depends on the look I want to achieve.
After I have photo that is correctly exposed, I then concentrate on highlights and shadows again. Using Highlights, Shadows, Whites and Blacks sliders inside of ACR, I make specific changes.
I mostly use Highlights / Shadows sliders, with Whites / Blacks mostly as a backup. I use H / S sliders to do fine adjustments. W / B sliders are a bit more heavy-handed, so I only use them if I have to. For example, if I have to make a light grey background white, I push the Whites slider to the right as much as I can without causing other issues within the photo.
Photoshop and exposure values

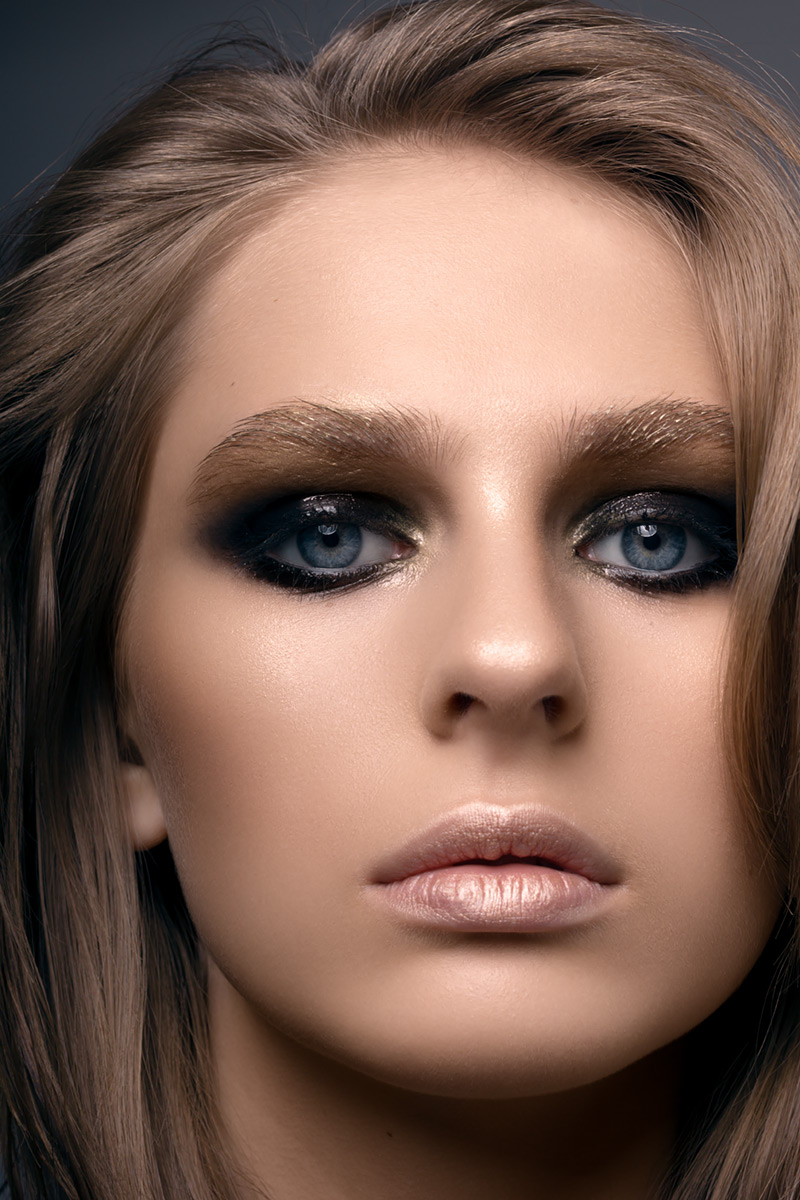
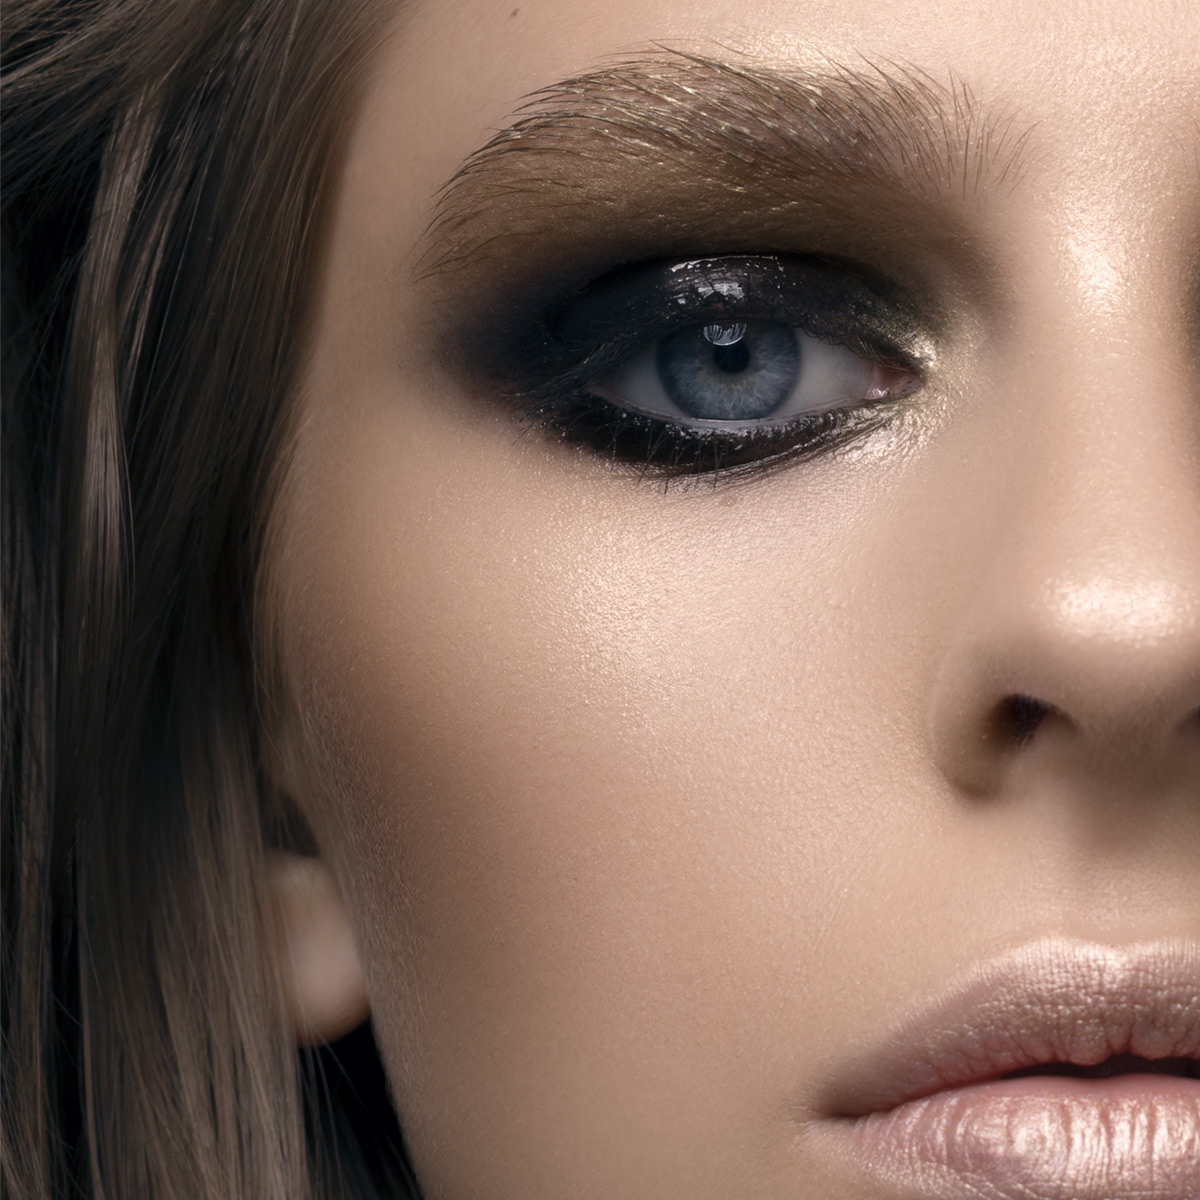
I have two photo examples for you this time. In the first example I have done most of my exposure modifications during RAW conversion stage (Example 1). In the second example (the photo from previous articles) – Example 2, I have made all of my modifications inside of Photoshop.
I have discussed the example 2 in my RAW conversion article, but just to mention again, I have not done any changes to exposure values in this case inside of ACR at all.
Example 1 is very different. I have done many changes inside of ACR and much less changes inside of Photoshop. Both of them were done 2 years ago by me, so I don’t really remember the specific thinking why this one was done this way and this one this way, but that is not very uncommon. Sometimes after the initial evaluation and after the cleaning and DB stage, I decide that I need to do additional exposure modifications. That’s when I do them in Photoshop. I suspect that in case of the two images, my plan was to use luminosity masks (more on that later) from the start in example nr 2. Therefore, I have left exposure untouched in RAW converter.
Heavy exposure modifications
The general idea is that if I have to do some heavy exposure modifications, I would most likely be doing them during RAW conversion stage as RAW files are much more flexible and can take more of abuse than TIFF or PSD file after transporting your image to Photoshop.
In case of the first example, I have made changes to pretty much all sliders which deal with exposure. I have added a bit of exposure, reduced the contrast, but then added highlights and shadows. I probably first played with H / S sliders, after that I decided that maybe there is too much of contrast now, so I reduce it using the dedicated Contrast slider. I have also boosted the whites a bit.
I wanted to keep the photo a touch darker, as I thought it would suit the mood better. If I recall correctly however, I have added back a touch of brightness in later stages in Photoshop.
OK, so now that we discussed what I do with exposure in the initial stages, during RAW conversion stage, let’s talk about what I do in Photoshop.
Exposure and colour
Inside of Photoshop I always try to separate exposure and colour work. I always work on exposure first and then colour. I even separate the adjustment layers which deal with exposure and colour, and group them in separate folders. It is much easier to understand which layer does what if they are separated into folders within the layer palette.
When it comes to working with exposure within Photoshop itself, I always complete cleaning and DB stage first, as per part 1 and 2 of this series of articles. The next step is exposure work.
I usually separate exposure modification within Photoshop into corrections and creative work.
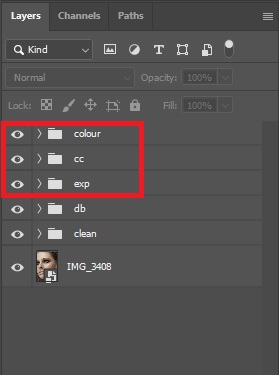
“exp” folder contains exposure modifications
“cc” folder contains colour correction work
“colour” folder contains colour grading layers
By corrections, I mean anything I need to deal with or fix. For example, if I have to lighten or darken a specific part of the image, I usually create a Curves adjustment layer, invert mask (so make it black instead of white) and then paint with white brush in the areas where I want to make specific changes (article about Curves coming soon).
To make exposure modifications inside of Photoshop, I always use adjustment layers and never make destructive changes to the base layer. This way has two advantages. One is, as mentioned, I don’t do any destructive changes to the image, and two, is that I can always go back, modify the change I have made or even remove them completely if I decide to do so later on. This actually does happen.
100% non-destructive
My workflow is 100% non-destructive, this means that I can switch off or modify all parts of my edit if I decide to do so.
The tools I use the most for working with exposure within Photoshop are Curves adjustment layer and Levels adjustment layer. I would say that I use Curves in 75% cases or more. Curves adjustment layer is so powerful and such a big part of my workflow, that I am considering creating a whole separate part about working with them in future, so stay tuned.
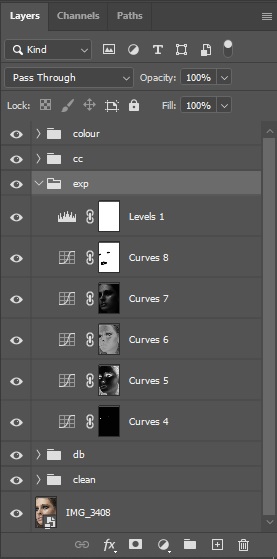
As mentioned before, in image nr 2 exposure has been mostly modified inside of Photoshop, so it is a great example to describe here in more detail to illustrate my point.
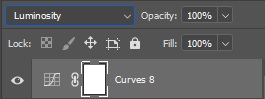
As you can see on the screenshot above, the exposure folder in that edit contains a few adjustment layers. Five of which are Curves and one Levels.
Luminosity masks
From time to time I use something called Luminosity masks to target specific exposure values. This is one of those cases. For example, if I want to boost mid-tones or shadows or highlights, I can create a luminosity mask, add it to curves layer and this way I can control that specific value. It is a process I don’t use as often these days, but it is a valuable technique to know. If you look at the image above, Curves 5, Curves 6 and Curves 7 contains luminosity masks.
When I want to make bigger changes to each of these values separately and also be in control how much of highlights / shadows / mid-tones I want to include, this is a great way to do so. The idea here is to use colour channels to help create masks that will control only specific parts of luminosity values. I might create a separate luminosity mask tutorial at later stages as well, but if you are interested how to do them yourself, you can find a great deal of help online. For example, here is one article I found online about luminosity masking.
I will mentioned here however, that for this specific image, I have darkened shadows and mid-tones, and also brightened highlights using curves with luminosity masks applied.
Creative freedom
I have also darkened the image globally a touch more, using another curves layer and then boosted overall brightness, especially the highlight side a touch more using Levels adjustment layer.
All of these adjustments were done to achieve a specific look. This was not a paid work, so I had no specific requirement from the photographer and I had a total creative freedom.
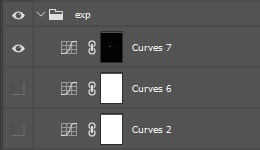
In the photo example nr 2, I have only created a few curves layer to deal with exposure inside of Photoshop… and then decided to switch 2 of them off. That’s the power of non-destructive workflow. If you remember, I have done quite a few modifications during RAW conversion stage, so I felt that things look OK and I don’t need to do much more here. So, in Photoshop I have only boosted the overall brightness level globally using one curves layer. In the second one I have added a touch of brightness locally to a specific part of the image using curves adjustment layer with inverted mask (black) and painted the changes with white soft brush.
Some tricks and tips
The trick I often use to direct viewer’s eye around the frame, is to make parts of the image lighter or darker depending on its importance. Human eye is drawn to bright subjects more than the darker ones. We can this, to show importance of one subject over the other. If you have a couple of subjects within the frame and want to make one more important than the other, I often manipulate brightness (or/and contrast) level of subjects within frame. Do you want to make one thing stand out more than the other? Make the one that’s more important brighter and darken a touch the other one.
The difference here doesn’t have to be huge. As long as one is brighter than the other (and few other tricks are followed too, I might write a separate article about them all in future), the viewer’s eye will just to the brighter one first. It’s such an important and easy trick that I have been using it for years.
Another trick I use is to use Luminosity blending mode to limit either Curves or Levels adjustment layer into changing just exposure values and leaving colour intact. It does not always work, especially if we make some drastic changes within exposure values, but for smaller changes it works quite well.
And that is all
In this part we have talked about how I go about making creative decisions in order to modify luminosity and exposure values. We have talked about making the changes during RAW conversion stage, as well as doing them in Photoshop. We have talked about what tools do I use and why, what changes I do often and how.
I hope this was useful to you and will help you on your road to developing a skin retouching workflow of your own. Please remember that we all do similar things differently and it is totally OK to do things your own way. This series is just meant to show how I do these things. Thank you for getting this far, Dear Reader.
Please also read part 1 and part 2 of our free skin retouching workflow, you can find links to all of other parts here:
Part 1 – My Skin Retouching Workflow Explained
Part 2 – My Skin Retouching Workflow Explained some more
Part 3 – My Skin Retouching Workflow – Working With RAW
Part 5 – My Skin Retouching Workflow – Curves Tool – Why is it important?
Part 6 – My Skin Retouch Workflow – Introduction to colour
Part 7 – My Skin Retouching Workflow – How to fix fingernails in Photoshop
Part 8 – My Skin Retouching Workflow – Simplify the image – remove distractions
If you would like to buy me a coffee, please use the link bellow. Thank you!
About the author

Adrian Alexander is a senior retoucher and founder of Ad Retouch Studio, photo retouching and post production studio based in UK. His first contact with Photoshop was in the 90s, but he found his true love of editing photographs during his photography years, which started when he purchased his first dSLR camera in January 2009. These days he is concentrated on his retouching business, finds pleasure in teaching, but his true love is still improving photos in Photoshop.